Smartphone photography has definitely leveled up in the past few years. Thanks to the evolution of smartphones with more powerful sensors and megapixels, people more and more prefer its convenience over bigger cameras. And because of this, more tools for better photographs have emerged.
Smartphone photography entails using your trusty camera phone, making the most out of its capabilities to improve your photography and achieve stunning photos without the need for professional cameras. As the shooter, you’ll want to make sure you capture quality photos that will engage your audience, whether you’re aiming for social media presence for publicity or just creating a personal digital album for your friends and family to see.
Below you’ll find the ultimate guide to easy smartphone photography tips, tricks, and techniques. You’ll read about what you need to extend your smartphone camera’s capabilities including tips for timelapse and street photography, and useful photo editing applications. This information will take your mobile snapshots to the next level.
Basic Equipment for Smartphone Photography
Much like its more advanced siblings, the smartphone camera can be supported with a range of supplementary accessories to manage some of the camera’s limitations and improve the quality of your images. These accessories are small and fairly cheap, so there’s no reason to pass on them if you want to take picture-perfect photos with your iPhone or Android device.
Lens Attachments

The most popular accessories for smartphone photography include attachments that can trick the view of your camera and add variation to your shots. There are small, interchangeable lenses that can be clipped onto your smartphone’s camera to give it different perspectives and focal lengths.
You can use a macro lens, wide angle lens, fisheye lens, or zoom lens. There’s even a circular polarizer lens that can be rotated to adjust photo saturation and eliminate unwanted reflections on water and glassy surfaces.
Smartphone Gimbal Stabilizer
A smartphone gimbal stabilizer is basically a handheld pod that uses weights and motors to keep a mounted camera steady. Even when you’re walking or running. It provides a better grip on your phone while allowing you to take sharper photos and smoother, more cinematic videos. Mounting takes seconds, and its size and portability makes it convenient for traveling.
Phone Tripod
A tripod is useful even for your non-professional camera phone. With its three legs, it supports the phone’s weight and maintains its stability to help you achieve sharp images and videos. Some tripods are even smaller, lighter, and more portable than gimbal stabilizers so they can easily fit in your small travel bag.
A tripod is great too for hands-free photography.
Pocket Spotlight
Pocket spotlight is a continuous light source that provides softer and more even lighting than your smartphone’s regular LED flash. It offers different brightness levels and comes in different shapes and sizes. Some look like smaller professional studio ring lights and are known for providing the most flattering light for selfies and product shots. Depending on the type, brand, and model, pocket spotlights can be clipped onto the smartphone or plugged into the headphone jack.
Tips for Time-lapse Photography
Time-lapse photography involves capturing tons of photos of the same scene at a fixed interval and using them to create a fast motion video that shows the passage of time. Commonly featured subjects and sceneries include those that are constantly moving and changing, such as traffic and colorful skies.
With the latest advancements in smartphone photography, it’s now possible for non-professionals to create their own stunning timelapse videos. Here are some tips and tricks for shooting professional-looking timelapse photos and videos:
Time Your Shots
The interval between your shots depends on the situation and the scene that you will be capturing. While there’s no ideal number of shots, you’ll want to take just enough pictures that will make a time-lapse video that’s at least 15 seconds long. So for cars and skies with fast-moving clouds, you can click the shutter every 2 seconds or less. For sceneries with slower movement (like sunrise and sunsets), you can take 8 seconds or longer between pictures.
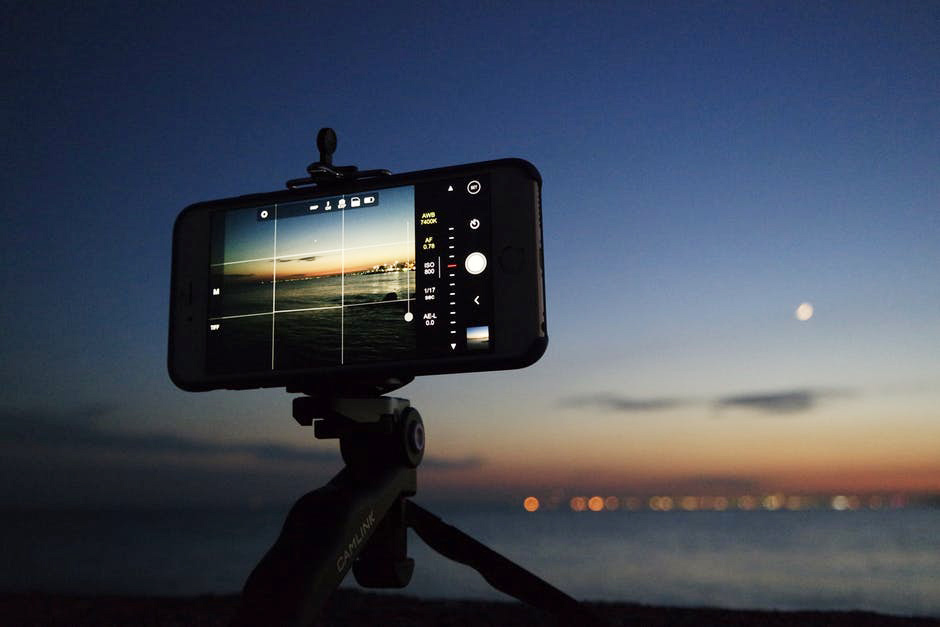
Use a Tripod

Avoiding camera shake is crucial to nailing a good timelapse. Even the slightest camera movements and adjustments in framing can distract your viewers from focusing on the scene. Besides, with the hundreds of photos that you’ll be taking, holding your phone during the entire shoot is not such a smart idea.
Go Manual
The trouble in taking time-lapse photos using smartphones is that the camera will usually try to correct every change of light and color temperature to give you a properly exposed image. This Auto Mode camera behavior beats the purpose of showing gradual changes between dark and bright skies.
The solution is the same across different types of cameras—go on manual mode. Some smartphone cameras may not offer it, but you can download apps like TimeLapse and Lapse It to gain some manual control over exposure and focus.
Shoot in Landscape Mode
Time-lapse videos are normally shot in landscape mode to be able to show more of the scene, especially when featuring skies. This orientation style also allows the shooter to experiment with different compositions, thus providing more variety and image elements for viewers to enjoy.
Download a Timelapse Application
Timelapse photography may have been around for decades, but now is still a good time for anybody to start. There is a growing number of useful mobile applications for creating great time-lapse videos. A quick search online can help you find popular time-lapse apps for your iOS or Android device.
Tips for Taking Candid Street Photos

A smartphone camera is arguably the best gear for street photography due to its discreet size and portability. With it, capturing candid moments and the beauty around you can be as quick and easy as whipping out your phone from your pocket. It’s no wonder many consumers are going for higher camera specs for street photography than investing on a digital camera.
By keeping a few helpful tips in mind, you can master this photography style with your very own smartphone.
Turn the Shutter Sound Off
Before anything, make sure to turn the shutter sound of your smartphone camera off or set it on silent. The point of taking spontaneous street photos is to capture real emotions and genuinely candid moments. So you don’t want the shutter sound to go off, attract attention, or worse, creep your subjects out when you’re trying to be sneaky.
Use Quick Shutter Speeds

The key to capturing quick and blur-free photos is to use fast shutter speeds. Professional cameras can do this easily, but most smartphones still have to use camera apps to manually control camera settings and shutter speeds. The built-in Sports or Kids and Pets Mode work well as it automatically adjusts settings to be able to use a faster shutter speed. However, it may not be as effective in difficult low-light situations.
Shoot from the Hip
Holding up your camera for proper framing not only makes you more noticeable to others but also takes up precious time. Practice shooting blindly with one hand and at a much lower angle near your hip to save yourself a few seconds. With enough practice, you’ll be able to catch those split-second moments quickly and discreetly.
Shoot in Landscape Mode
Unlike in time-lapse photography, street photography gives you more freedom to shoot in portrait mode. But if you’re hoping to look inconspicuous while taking your shot or need to frame your photos properly, you should consider shooting in landscape mode. Doing so will make you look like you may just be playing a game or watching a video clip, whereas holding your phone upright may make people think that you’re taking a photo.
Look for Your Story

Meaningful and engaging street photography involves more than just taking random photos. You’ll need to figure out why you’re taking the photo and how you’re going to capture it in a way that will send your desired message to your viewers.
Take some time before actually taking out your phone to observe and look for interesting stories to tell and personalities to feature. And as you plan your shot, consider your composition. Include elements and backgrounds that will complement your subject and help tell your story.
5 Free Photo Editing Apps
There will be instances when you can’t rely on skills alone to achieve your desired output, especially when there’s a need for a little photo manipulation and color adjustments. This is where photo enhancement applications come in. With your resourcefulness and creativity, you can utilize these photo editing apps to give your photos that much-needed boost in quality and turn them into one-of-a-kind images.
VSCO

VSCO is by far the most popular photo editing app for iPhone and Android users. It offers a good variety of editing tools and a number of gorgeous filters that can definitely rival those on Instagram. At the same time, it’s a camera app that offers manual camera settings, so you can take photos with it and won’t have to open any other app for editing and sharing.
Snapseed
Snapseed is a lot like VSCO, but this one is also available on tablets. On it’s user-friendly and intuitive interface, you’ll find advanced functions like a selective adjust feature that allows you to make edits on selected parts of a photo without affecting the rest of the image. It also offers filters, the most popular ones being Grunge, Retrolux, Vintage, and Monochrome.
Adobe Lightroom
For fans of Adobe Lightroom on Windows or Mac, there’s an iPad version that you can sync it with. Having one on a mobile device saves you time in having to open your desktop just to make quick edits and apply its signature preset effects. Your existing subscription to Adobe will also allow you to make the most out of this mobile version.

Adobe Photoshop Express (iOS, Android, Windows)
Much like its insanely popular desktop counterpart, Adobe Photoshop Express offers some of the most in-demand editing tools and filters for both professionals and amateurs. Available on iOS, Android, and Windows, the app offers basic control tools and cool filters, and allows you to add borders and frames to your photos. You can even combine multiple photos into a single image with its Photoshop Mix feature. It also supports the import and editing of images in RAW format.
Pixlr Express
The online Pixlr Editor website is known for its Photoshop-like selective editing tools, such as Clone Stamp, Burn, Sponge, and even the Wand tool. Its mobile counterpart, Pixlr Express, is also good for removing small spots and marks on images, giving your photos Photoshop-like filter effects, and taking care of your other quick image correction needs. It’s available for download on iOS and Android devices.
Hopefully these tips will help up your smartphone photography game. What is your favourite subject to photograph?

A good read Mani. This one comes in handy specially to travel bugs who don’t have the luxury of bringing a big camera.
Kudos!
LikeLike
You can get a pretty decent camera for not that much, but I do get the major convenience of being able to fit your camera in your pocket! 🙂
LikeLike
Such a useful post! Thank you for sharing Mani! 🙂
LikeLike
No problem 😉 Have a great weekend Lisa!
LikeLike